Seimens Schuchert DDr 1 scratch build

5 years 7 months ago #310
by Stevef
Seimens Schuchert DDr 1 scratch build was created by Stevef
Evening All,
There seems to be an increased interest in triplanes among WW1 modellers at the moment, probably because Meng have released the WnW Fokker triplane after the latter company ceased trading earlier this year. It was in discussion about this topic on another thread where I found out about another, and in my opinion much more interesting, triplane from Siemens Schuckert Werke. Most people will probably be like me and not heard of this machine, but it was the product of the "triplane craze" in Germany in late 1917 following the success of the Sopwith triplane on the Western Front. Research has shown that two kits have been released: one in 1/48 scale in resin and a vacuform in 1/72 scale. I do not build in either resin or 1/48 scale, and consider that if you are going to build a vacuform you might just as easily scratch one instead. For those of you who are not familiar with this machine there are more details here: www.wikiwand.com/en/Siemens-Schuckert_DDr.I
I have to make my models on a shoestring so I propose to make one of my own using as much scrap materials and left-overs from earlier builds as I can. Here is my kit:

The above consists of scrap plastic pieces, some bent 30 thou card for the wings, wood for the propellors, pieces of soft iron wire for the booms: the only new material which I will use will be strip and rod which I already have in stock.
The wings were cut from the bent plastic sheet and the corners rounded and shaped, as was the aerofoil section. Then I added 10 x 20 thou strip for the ribs:

The wings in the image above are in descending order as per the original aircraft: the lower wing has strip in place and trimmed, the middle wing has untrimmed strip and the top wing awaits the application of the strip. When all the strip is in place and trimmed I will gently sand it down so that it is only just visible.
I made a mould for the fuselage from basswood after I had tried to make a fuselage from plastic sheet. The curve on the top of the nacelle defeated me so I reverted to a tested method and made one by push moulding, using scrap plastic of which I have plenty. I also made two engine nacelles using an old mould which I had made for a Caudron G IV some years ago, and I found a spare spinner from a Dornier flying boat build, also from some years ago:

I do not intend to put much detail in the cockpit because it will not be visible and anyway no plans survive to the best of my knowledge. This build is not large or particularly complex but I fear it is going to take longer than usual as have a number of issues looming which are going to take me from my favoured activity in the next few weeks, so updates may be erratic and uneven.
Thanks for looking.
Stevef.
There seems to be an increased interest in triplanes among WW1 modellers at the moment, probably because Meng have released the WnW Fokker triplane after the latter company ceased trading earlier this year. It was in discussion about this topic on another thread where I found out about another, and in my opinion much more interesting, triplane from Siemens Schuckert Werke. Most people will probably be like me and not heard of this machine, but it was the product of the "triplane craze" in Germany in late 1917 following the success of the Sopwith triplane on the Western Front. Research has shown that two kits have been released: one in 1/48 scale in resin and a vacuform in 1/72 scale. I do not build in either resin or 1/48 scale, and consider that if you are going to build a vacuform you might just as easily scratch one instead. For those of you who are not familiar with this machine there are more details here: www.wikiwand.com/en/Siemens-Schuckert_DDr.I
I have to make my models on a shoestring so I propose to make one of my own using as much scrap materials and left-overs from earlier builds as I can. Here is my kit:
The above consists of scrap plastic pieces, some bent 30 thou card for the wings, wood for the propellors, pieces of soft iron wire for the booms: the only new material which I will use will be strip and rod which I already have in stock.
The wings were cut from the bent plastic sheet and the corners rounded and shaped, as was the aerofoil section. Then I added 10 x 20 thou strip for the ribs:
The wings in the image above are in descending order as per the original aircraft: the lower wing has strip in place and trimmed, the middle wing has untrimmed strip and the top wing awaits the application of the strip. When all the strip is in place and trimmed I will gently sand it down so that it is only just visible.
I made a mould for the fuselage from basswood after I had tried to make a fuselage from plastic sheet. The curve on the top of the nacelle defeated me so I reverted to a tested method and made one by push moulding, using scrap plastic of which I have plenty. I also made two engine nacelles using an old mould which I had made for a Caudron G IV some years ago, and I found a spare spinner from a Dornier flying boat build, also from some years ago:
I do not intend to put much detail in the cockpit because it will not be visible and anyway no plans survive to the best of my knowledge. This build is not large or particularly complex but I fear it is going to take longer than usual as have a number of issues looming which are going to take me from my favoured activity in the next few weeks, so updates may be erratic and uneven.
Thanks for looking.
Stevef.
Please Log in to join the conversation.
5 years 7 months ago #311
by Stevef
Replied by Stevef on topic Seimens Schuchert DDr 1 scratch build
Evening All,
I have managed to make a little progress which I can report upon here. I started by completing the basic fuselage nacelle - I added a seat for the pilot, floor and control stick, and an IP but little else because it cannot be seen. The fuselage will need some cleaning up of the joints as with most push moulds that I make and I suspect that the tube of filler will get a bit of a bash too!
I also made the engines: I cut two circles from 60 thou card and cut the cylinders from 60thou rod. The push rods were made from 20 thou rod. I did not scribe the cylinder cooling fins because again they will not be very visible on the completed model: I am trying to keep this one simple.


Thanks for looking.
I have managed to make a little progress which I can report upon here. I started by completing the basic fuselage nacelle - I added a seat for the pilot, floor and control stick, and an IP but little else because it cannot be seen. The fuselage will need some cleaning up of the joints as with most push moulds that I make and I suspect that the tube of filler will get a bit of a bash too!
I also made the engines: I cut two circles from 60 thou card and cut the cylinders from 60thou rod. The push rods were made from 20 thou rod. I did not scribe the cylinder cooling fins because again they will not be very visible on the completed model: I am trying to keep this one simple.
Thanks for looking.
Please Log in to join the conversation.
5 years 7 months ago #312
by Stevef
Replied by Stevef on topic Seimens Schuchert DDr 1 scratch build
Evening All,
I did warn that progress would be erratic, and life has kept up to expectation as I have not been able to do a great deal even with the new restrictions on outside activity: most of my activities are at home so I am not affected as much as many.
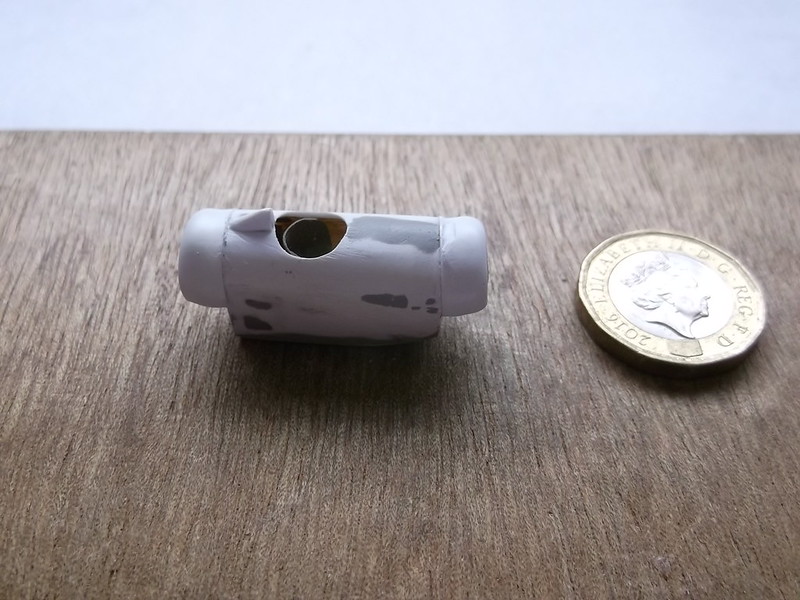
I have made a little progress however, including shaping the nacelle and the cowlings. The latter were push moulded using an old set of moulds I had from an earlier scratch build. The fronts of the cowliings had two large cut-outs and the lower part was removed. To get this arrangement I started by drawing the openings on the front of the cowling mould:
 [
[
I drilled small holes around the edges of the opening and a single larger one in the centre for the propellor shaft:

I cut around the holes to remove the bulk of the unwanted plastic:

and finally cleaned up the openings with a file:

The lower parts of the fronts of the cowlings were cut away and the units cemented to the nacelle. I had also filed and sanded the joints of the nacelle and then I used a reasonable amount of filler to obscure the joints and some dimples caused by glue deforming the plastic where I had added formers inside. Sanding helped to get the shape and finish that I wanted. A small pice of scrap was used to shape the headrest:


There were two plates at the rear of the nacelle which were to direct cooling air to the rear rotary engine - these were added and the joints cleaned up with glasspaper:
I have still to add a coaming around the cockpit opening..
Thanks for looking.
Stevef.
I did warn that progress would be erratic, and life has kept up to expectation as I have not been able to do a great deal even with the new restrictions on outside activity: most of my activities are at home so I am not affected as much as many.
I have made a little progress however, including shaping the nacelle and the cowlings. The latter were push moulded using an old set of moulds I had from an earlier scratch build. The fronts of the cowliings had two large cut-outs and the lower part was removed. To get this arrangement I started by drawing the openings on the front of the cowling mould:
I drilled small holes around the edges of the opening and a single larger one in the centre for the propellor shaft:
I cut around the holes to remove the bulk of the unwanted plastic:
and finally cleaned up the openings with a file:
The lower parts of the fronts of the cowlings were cut away and the units cemented to the nacelle. I had also filed and sanded the joints of the nacelle and then I used a reasonable amount of filler to obscure the joints and some dimples caused by glue deforming the plastic where I had added formers inside. Sanding helped to get the shape and finish that I wanted. A small pice of scrap was used to shape the headrest:
There were two plates at the rear of the nacelle which were to direct cooling air to the rear rotary engine - these were added and the joints cleaned up with glasspaper:
I have still to add a coaming around the cockpit opening..
Thanks for looking.
Stevef.
Please Log in to join the conversation.
5 years 7 months ago #313
by Stevef
Replied by Stevef on topic Seimens Schuchert DDr 1 scratch build
Evening All,
I did write that this one was going to be slow - well it is being so. Painting of the main components is now complete: the fuselage was painted gloss black before I applied several thinned coats of aluminium (acrylics). This has given a metallic finish but not high gloss which I think would be unrealistic. It has also concealed all of the filler...
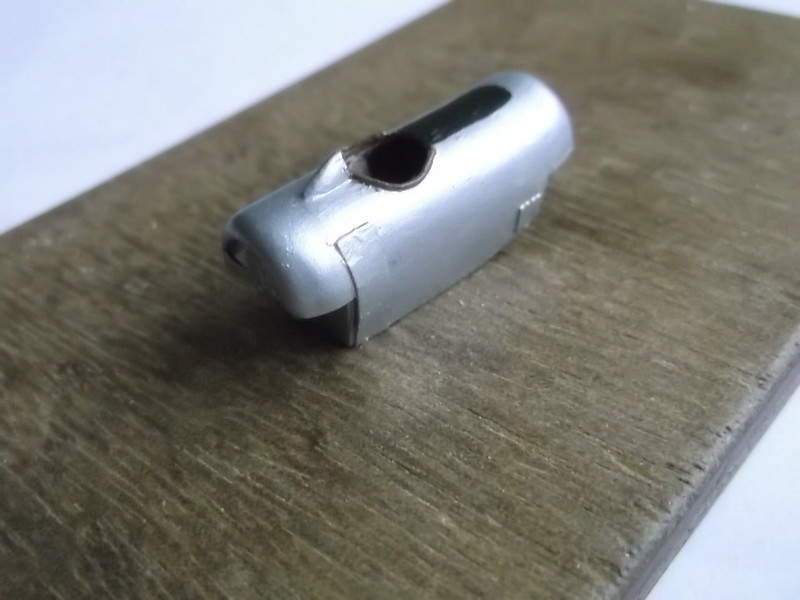

I think that the black anti-glare panel will need to be made a little wider but that is a simple task. The wings were also painted in acrylics - white with a small amount of Humbrol 103 clear doped linen. The Humbrol piant is much too yellow but when mixed with white a good approximation can be achieved, and different shades are easily mixed. The crosses were home printed:

I am still thinking about how to attach the wings: there are lots of holes that have to be drilled and they all have to line up accurately....
More later.
Stevef.
Thanks for looking.
I did write that this one was going to be slow - well it is being so. Painting of the main components is now complete: the fuselage was painted gloss black before I applied several thinned coats of aluminium (acrylics). This has given a metallic finish but not high gloss which I think would be unrealistic. It has also concealed all of the filler...
I think that the black anti-glare panel will need to be made a little wider but that is a simple task. The wings were also painted in acrylics - white with a small amount of Humbrol 103 clear doped linen. The Humbrol piant is much too yellow but when mixed with white a good approximation can be achieved, and different shades are easily mixed. The crosses were home printed:
I am still thinking about how to attach the wings: there are lots of holes that have to be drilled and they all have to line up accurately....
More later.
Stevef.
Thanks for looking.
Please Log in to join the conversation.
5 years 7 months ago #314
by Stevef
Replied by Stevef on topic Seimens Schuchert DDr 1 scratch build
Evening All,
I have been dithering with this project because I was not sure how to fix the lower wings to fuselage assembly. I had run through several possibilities in my mind:
1. Fix the lower wing via the V struts to the fuselage, then place the middle wings on the fuselage to measure where the strut holes should be. Drill the holes in the middle wing, attach it to the fuselage and insert the wing struts. Finally add the top wing.
2. Put the middle wing on to the fuselage with the strut holes pre-drilled and struts already in place. Mark off on the lower wing where the struts would be and drill holes, then fix lower wing to fuselage. Add top wing.
3. Drill holes in the three wings, put either the lower or middle wing in place, add the second wing and struts and hope that everything lines up. Add top wing.
Option 3 was not a good one - no matter how carefully things are measured from the plans, models are never exactly the same as the plans and it was very likely that the strut holes would be mis-aligned. So it was option 1 or 2. I decided that because the middle wings have to be butt joined to the fuselage, there was a good chance that they would break off while trying to fix the lower wing into place, so I went for a variation on option 1, except that I drilled the holes in the middle wing before I put the lower wing in place. Not a good idea....
The lower wing went on well - with support the structure dried well and square. The problems started when I tried to fix the middle wings because the strut holes did not line up so I had to fill them and drill new ones. That was a real fiddle, the more so because the forward struts have a distinct bend forwards above the middle wing. After much effort I have fitted the lower and middle wings and struts - now I just have to put the top wing and cabanes into place:
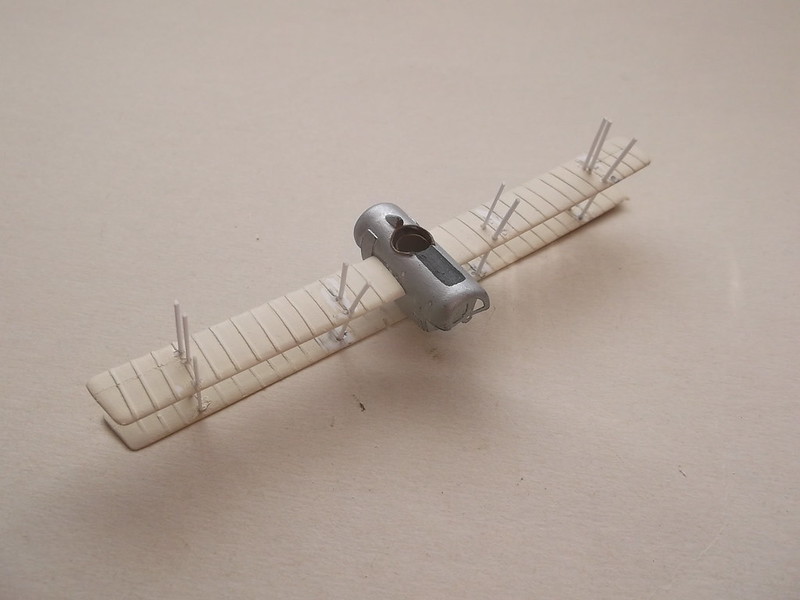


I will have to touch in the paint on the wings to conceal where I have filled holes and scraped the existing paint.
The last image shows the top wing ready to put on to the struts: that is not going to be the easiest operation either as there are so many strut ends to cement at the same time. I decided to leave that for a couple of days after all of the messing around with the lower wings. More later.
Thanks for looking.
Stevef.
I have been dithering with this project because I was not sure how to fix the lower wings to fuselage assembly. I had run through several possibilities in my mind:
1. Fix the lower wing via the V struts to the fuselage, then place the middle wings on the fuselage to measure where the strut holes should be. Drill the holes in the middle wing, attach it to the fuselage and insert the wing struts. Finally add the top wing.
2. Put the middle wing on to the fuselage with the strut holes pre-drilled and struts already in place. Mark off on the lower wing where the struts would be and drill holes, then fix lower wing to fuselage. Add top wing.
3. Drill holes in the three wings, put either the lower or middle wing in place, add the second wing and struts and hope that everything lines up. Add top wing.
Option 3 was not a good one - no matter how carefully things are measured from the plans, models are never exactly the same as the plans and it was very likely that the strut holes would be mis-aligned. So it was option 1 or 2. I decided that because the middle wings have to be butt joined to the fuselage, there was a good chance that they would break off while trying to fix the lower wing into place, so I went for a variation on option 1, except that I drilled the holes in the middle wing before I put the lower wing in place. Not a good idea....
The lower wing went on well - with support the structure dried well and square. The problems started when I tried to fix the middle wings because the strut holes did not line up so I had to fill them and drill new ones. That was a real fiddle, the more so because the forward struts have a distinct bend forwards above the middle wing. After much effort I have fitted the lower and middle wings and struts - now I just have to put the top wing and cabanes into place:
I will have to touch in the paint on the wings to conceal where I have filled holes and scraped the existing paint.
The last image shows the top wing ready to put on to the struts: that is not going to be the easiest operation either as there are so many strut ends to cement at the same time. I decided to leave that for a couple of days after all of the messing around with the lower wings. More later.
Thanks for looking.
Stevef.
Please Log in to join the conversation.
Time to create page: 0.132 seconds
- You are here:
-
Home

-
Forum
-
Show & Tell
-
Aircraft
- Seimens Schuchert DDr 1 scratch build