Scratch build 1/72 Caproni Ca 5

6 years 11 months ago #234
by Stevef
Scratch build 1/72 Caproni Ca 5 was created by Stevef
Evening All,
If you do not know what the Caproni Ca 5 looked like here are a couple of links:
www.alamy.com/italian-caproni-ca5-bomber...1-image66158621.html
1000aircraftphotos.com/Contributions/SmithGaryL/8921.htm
It was a trimotor bomber designed in 1917 to replace the successful Caproni Ca 3 which was used by the Italians to bomb targets in Austria. This required the aircraft to fly long distances including over the Alps, so a third engine was considerd to be desirable in case one of them malfunctioned on the long flights. Unfortunately the engines chosen to power the Ca 5 were not particularly reliable, so although the airframe was sound, the aircraft was rather less so and the Ca 3 soldiered on beside its successor to the end of the war. However the type remained in service until the early 1920's and was used by the Americans.
I am building this as part of a group build in memory of Des Dellatore on another site: Des was a superb scratch builder who made 1/32 scale models of very early aircraft which are now rightly displayed in a museum. I cannot find any kit of this machine which makes it an ideal subject for a scratch build to his memory, although my model will be 1/72 scale. Interesting features of the type include the engines, triple tail unit, twin booms a platform for the rear gunner above the engine, and double wheeled undercarriage: markings seem to have been relatively straightforward too so can be easily made at home.
There is some reference material on this type - certainly enough to be able to make a reasonably accurate model, although as usual with WW1 types, colours are interpreted in different ways in the sources.
I have assembled my kit: styrene sheet of various thicknesses, strip, rod, wood, and other materials as needed as the build progresses. I have started by marking up the fuselage nacelle on a block of wood and am ready to start carving:

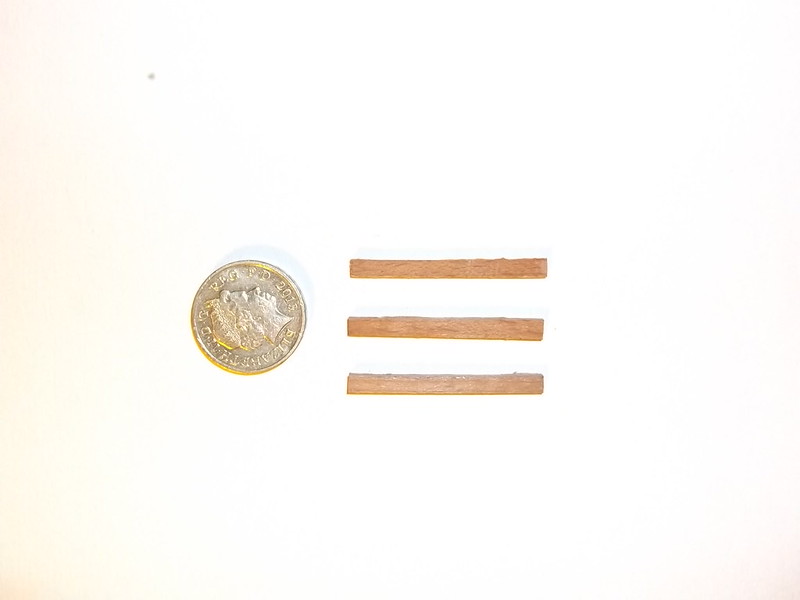
and I have cut some styrene sheet for the wings. These are quite thick so to get the thickness and aerofoil section I am trying out an idea. I have cut a piece of 30 thou card which has been bent in hot water and laminated this with a strip of 20 thou card which was laid over the top. The 30 thou strip was wide enough to extend to the rear spar, and then a strip of 20 thou card and 10 thou card was laid along the trailing edge of the 30 thou card. Here are the strips before they were glued together:

The underside will be sanded and filled to give the aerofoil section and any joints smoothed over with filler: hopefully if there are any remaining marks these will not be visible because they will be under the wings. Finally I have cut some wood ready to be carved into propellors:
Thanks for looking.
If you do not know what the Caproni Ca 5 looked like here are a couple of links:
www.alamy.com/italian-caproni-ca5-bomber...1-image66158621.html
1000aircraftphotos.com/Contributions/SmithGaryL/8921.htm
It was a trimotor bomber designed in 1917 to replace the successful Caproni Ca 3 which was used by the Italians to bomb targets in Austria. This required the aircraft to fly long distances including over the Alps, so a third engine was considerd to be desirable in case one of them malfunctioned on the long flights. Unfortunately the engines chosen to power the Ca 5 were not particularly reliable, so although the airframe was sound, the aircraft was rather less so and the Ca 3 soldiered on beside its successor to the end of the war. However the type remained in service until the early 1920's and was used by the Americans.
I am building this as part of a group build in memory of Des Dellatore on another site: Des was a superb scratch builder who made 1/32 scale models of very early aircraft which are now rightly displayed in a museum. I cannot find any kit of this machine which makes it an ideal subject for a scratch build to his memory, although my model will be 1/72 scale. Interesting features of the type include the engines, triple tail unit, twin booms a platform for the rear gunner above the engine, and double wheeled undercarriage: markings seem to have been relatively straightforward too so can be easily made at home.
There is some reference material on this type - certainly enough to be able to make a reasonably accurate model, although as usual with WW1 types, colours are interpreted in different ways in the sources.
I have assembled my kit: styrene sheet of various thicknesses, strip, rod, wood, and other materials as needed as the build progresses. I have started by marking up the fuselage nacelle on a block of wood and am ready to start carving:
and I have cut some styrene sheet for the wings. These are quite thick so to get the thickness and aerofoil section I am trying out an idea. I have cut a piece of 30 thou card which has been bent in hot water and laminated this with a strip of 20 thou card which was laid over the top. The 30 thou strip was wide enough to extend to the rear spar, and then a strip of 20 thou card and 10 thou card was laid along the trailing edge of the 30 thou card. Here are the strips before they were glued together:
The underside will be sanded and filled to give the aerofoil section and any joints smoothed over with filler: hopefully if there are any remaining marks these will not be visible because they will be under the wings. Finally I have cut some wood ready to be carved into propellors:
Thanks for looking.
Please Log in to join the conversation.
6 years 10 months ago #235
by Stevef
Replied by Stevef on topic Scratch build 1/72 Caproni Ca 5
Evening All,
Little progress has been made as anticipated: life has got in the way and really slowed me down. However I have managed to complete one wing after much sanding, filling, sanding, more filling, more sanding....you get the idea I am sure.
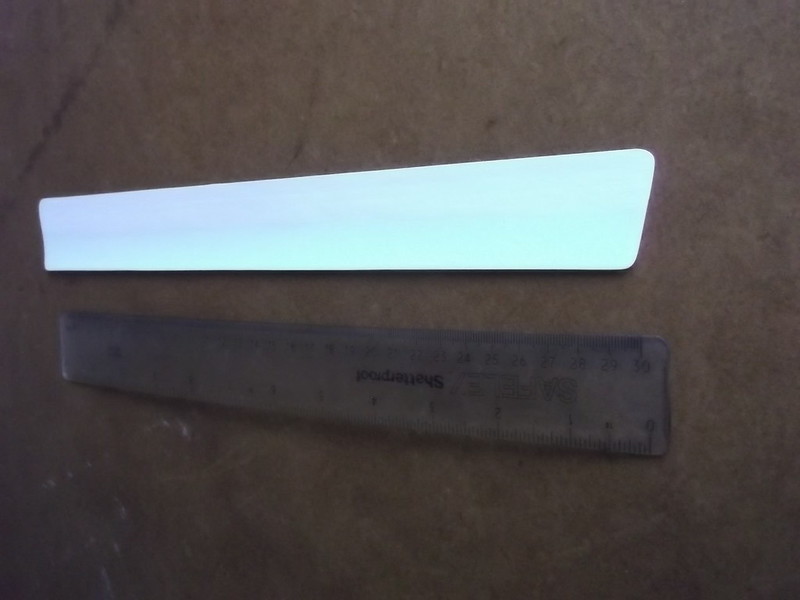
I know that this is not the most exciting photo of a wing but I cannot get one to show just how smooth the surface is. However it does show that I have succeeded in getting the curvature right. Anyway I have got to do all of this again because like all true aeroplanes, this one had TWO wings!
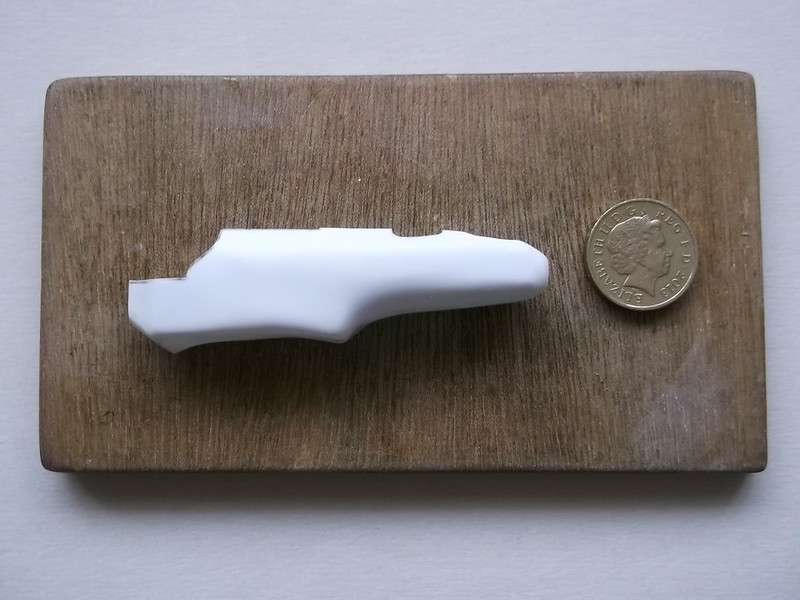
I have also carved the fuselage nacelle and moulded and cut out the halves. I just wanted to be able to have something to show for a lot of work and I could carve this while I was waiting for filler on the wing to dry out. Here are the moulds for the nacelle - old fashioned push/plunge moulding I am afraid - none of that super-high-tech vacuform stuff from me!

And here are the two halves with the male mould:

There will be quite a lot to do on these because there is a large area of the interior which will be visible - the only problem is that there is very little published on what it all looked like, so I am going to base the details on the earlier Ca 3 and use modeller's license for the rest! There were also cooling gills on the nose and a radiator in the front end, plus the rear gunner's position - quite enough to be getting on with....when life permits.
Thanks for looking.
Stevef.
Little progress has been made as anticipated: life has got in the way and really slowed me down. However I have managed to complete one wing after much sanding, filling, sanding, more filling, more sanding....you get the idea I am sure.
I know that this is not the most exciting photo of a wing but I cannot get one to show just how smooth the surface is. However it does show that I have succeeded in getting the curvature right. Anyway I have got to do all of this again because like all true aeroplanes, this one had TWO wings!
I have also carved the fuselage nacelle and moulded and cut out the halves. I just wanted to be able to have something to show for a lot of work and I could carve this while I was waiting for filler on the wing to dry out. Here are the moulds for the nacelle - old fashioned push/plunge moulding I am afraid - none of that super-high-tech vacuform stuff from me!
And here are the two halves with the male mould:
There will be quite a lot to do on these because there is a large area of the interior which will be visible - the only problem is that there is very little published on what it all looked like, so I am going to base the details on the earlier Ca 3 and use modeller's license for the rest! There were also cooling gills on the nose and a radiator in the front end, plus the rear gunner's position - quite enough to be getting on with....when life permits.
Thanks for looking.
Stevef.
Please Log in to join the conversation.
6 years 10 months ago #236
by Stevef
Replied by Stevef on topic Scratch build 1/72 Caproni Ca 5
Evening All,
I have been working on a part of the model where I have very little information as I have been unable to find any reference material for the interior. So I have based my interior on the Ca 3 and other contemporary large aircraft: I do not claim any authenticity for this part but then I doubt whether anyone else can. In any event most of what I have added will be barely seen but at least there is something in the cockpits.
The cockpit interior for the pilots was scratched from card and the floor was modelled as slats rather than a solid floor. The control wheels were mde from rod and a simple control console made with throttles. Similarly the rear gunner's position was basic - a seat and floor:

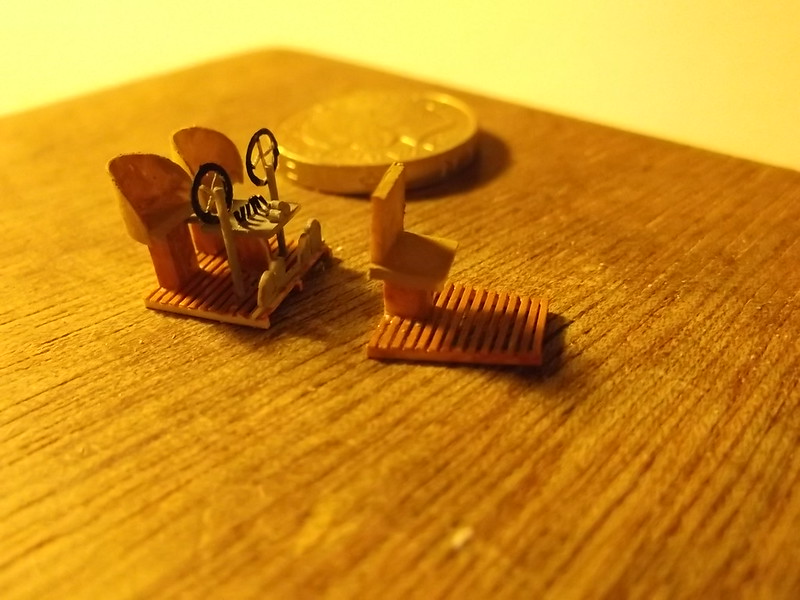
Unfortunately I forgot to photograph the interior of the fuselage sides to show the simplified structure which I had made from 10 x 20 thou strip and some thin rod. Some of the detail in the rear cockpit can just about be seen in one of the photos below. The fuselage is now closed and looks like this:


The next step will be to add the gun ring to the nose position and the radiator and cooling gills to the nose area.
Thanks for looking.
I have been working on a part of the model where I have very little information as I have been unable to find any reference material for the interior. So I have based my interior on the Ca 3 and other contemporary large aircraft: I do not claim any authenticity for this part but then I doubt whether anyone else can. In any event most of what I have added will be barely seen but at least there is something in the cockpits.
The cockpit interior for the pilots was scratched from card and the floor was modelled as slats rather than a solid floor. The control wheels were mde from rod and a simple control console made with throttles. Similarly the rear gunner's position was basic - a seat and floor:
Unfortunately I forgot to photograph the interior of the fuselage sides to show the simplified structure which I had made from 10 x 20 thou strip and some thin rod. Some of the detail in the rear cockpit can just about be seen in one of the photos below. The fuselage is now closed and looks like this:
The next step will be to add the gun ring to the nose position and the radiator and cooling gills to the nose area.
Thanks for looking.
Please Log in to join the conversation.
6 years 10 months ago - 6 years 9 months ago #237
by Stevef
Replied by Stevef on topic Scratch build 1/72 Caproni Ca 5
Evening All,
I have been working on the fuselage nacelle - trying to make a decent gun ring on the nose and add some radiator cooling vents around the front end. The Ca 5 was a trimotor like the earlier Ca 3, which presented the designers with the problem of how to cool the pusher engine at the rear of the fuselage nacelle. The answer was to mount a radiator in the extreme front of the nose and pump the cooling water from the engine to the nose and back again. It does not require a degree in mechanical or thermal engineering to work out that this was not an optimal solution: the type was not a success in part because of the overheating problems associated with the engine mounted in the fuselage. However that may have been I still had to add the coolig gills to the fuselage (and will have to add more later to the booms when I get around to making them). I decided that if I cut and glued strips of 10 x 20 thou strip in the right places and then used a file and glasspaper to shape them I might just get away with something resembling said gills:


I have also built up the nose for the front gunners gun ring with a plastic disc which was cut and filed to fit the nose position. Filler did the rest: you can also see the filler around various parts of the fuselage mouldings where trimming and small errors needed correction. When all is primed I am hoping that the blemishes will disappear.... we will see.

I decided to apply more to 10 x 30 thou strip and add the ribs to the wings. For those who may not know of this technique (and I am constantly asked about this at model club open days), here is a brief description:
I mark the positions of the ribs with a pencil on the wings, tail surfaces, ailerons, elevators, rudders, etc as appropriate. In this case I am using 10 x 30 strip because this was a large aircraft and the ribs would accordingly have been wider. On smaller aircraft I use 10 x 20 thou strip, and on larger scale aircraft I use larger strip suitable for the scale.
I cut lengths of strip which are longer than the chord of the surface to be covered. I apply liquid cement liberally along the pencil line and quicly lay a strip directly on to the line and gently press it down with the end of a nail file of other suitable hard, flat tool.
When all of the strips have been applied and the glue allowed enough time to dry I check each strip by trying to push it gently sideways. If any section of strip have not adhered properly I apply more cement to the areas which have not stuck down.
When the cement is dry and all the ribs are firmly in place I cut off the ends of the strips with a sharp scalpel andI gently rub them along their lengths with fine grade glass paper to take off the sharp edges and give them a rounded cross profile. Finally a couple of coats of primer ensure that any small gaps or blemishes disappear.
This photo shows some of the strip being applied to the lower wing and one of the ailerons: the yellowish strip will be under the fuselage nacelle so if it is visible later the bright white plastic surface will not show.

Waiting for liquid cement to dry can be tedious so I started to build one of the engines (there will be three eventually). The engines were 6 cylinder Fiat A 12 inlines developing between 200 and 300 horse power on the early variants: later machines had Fiat Isotta or Liberty engines fitted. The differences between the original and later Fiat engines are not really apparant in this scale so I made one using plastic rod of different diameters, strip and bits of sheet - some of the latter was laminated to make the engine block/sump. The components look like this when laid out:

and like this when glued together and painted:


Only two more of those to make now, but at least I know how to do it so they should not take too long..
The next update will be delayed as unfortunately I have to go on my travels (again) for a couple of weeks. But if you have been, thanks for looking.
I have been working on the fuselage nacelle - trying to make a decent gun ring on the nose and add some radiator cooling vents around the front end. The Ca 5 was a trimotor like the earlier Ca 3, which presented the designers with the problem of how to cool the pusher engine at the rear of the fuselage nacelle. The answer was to mount a radiator in the extreme front of the nose and pump the cooling water from the engine to the nose and back again. It does not require a degree in mechanical or thermal engineering to work out that this was not an optimal solution: the type was not a success in part because of the overheating problems associated with the engine mounted in the fuselage. However that may have been I still had to add the coolig gills to the fuselage (and will have to add more later to the booms when I get around to making them). I decided that if I cut and glued strips of 10 x 20 thou strip in the right places and then used a file and glasspaper to shape them I might just get away with something resembling said gills:
I have also built up the nose for the front gunners gun ring with a plastic disc which was cut and filed to fit the nose position. Filler did the rest: you can also see the filler around various parts of the fuselage mouldings where trimming and small errors needed correction. When all is primed I am hoping that the blemishes will disappear.... we will see.
I decided to apply more to 10 x 30 thou strip and add the ribs to the wings. For those who may not know of this technique (and I am constantly asked about this at model club open days), here is a brief description:
I mark the positions of the ribs with a pencil on the wings, tail surfaces, ailerons, elevators, rudders, etc as appropriate. In this case I am using 10 x 30 strip because this was a large aircraft and the ribs would accordingly have been wider. On smaller aircraft I use 10 x 20 thou strip, and on larger scale aircraft I use larger strip suitable for the scale.
I cut lengths of strip which are longer than the chord of the surface to be covered. I apply liquid cement liberally along the pencil line and quicly lay a strip directly on to the line and gently press it down with the end of a nail file of other suitable hard, flat tool.
When all of the strips have been applied and the glue allowed enough time to dry I check each strip by trying to push it gently sideways. If any section of strip have not adhered properly I apply more cement to the areas which have not stuck down.
When the cement is dry and all the ribs are firmly in place I cut off the ends of the strips with a sharp scalpel andI gently rub them along their lengths with fine grade glass paper to take off the sharp edges and give them a rounded cross profile. Finally a couple of coats of primer ensure that any small gaps or blemishes disappear.
This photo shows some of the strip being applied to the lower wing and one of the ailerons: the yellowish strip will be under the fuselage nacelle so if it is visible later the bright white plastic surface will not show.
Waiting for liquid cement to dry can be tedious so I started to build one of the engines (there will be three eventually). The engines were 6 cylinder Fiat A 12 inlines developing between 200 and 300 horse power on the early variants: later machines had Fiat Isotta or Liberty engines fitted. The differences between the original and later Fiat engines are not really apparant in this scale so I made one using plastic rod of different diameters, strip and bits of sheet - some of the latter was laminated to make the engine block/sump. The components look like this when laid out:
and like this when glued together and painted:
Only two more of those to make now, but at least I know how to do it so they should not take too long..
The next update will be delayed as unfortunately I have to go on my travels (again) for a couple of weeks. But if you have been, thanks for looking.
Last edit: 6 years 9 months ago by Stevef.
Please Log in to join the conversation.
6 years 9 months ago #238
by Stevef
Replied by Stevef on topic Scratch build 1/72 Caproni Ca 5
Evening All,
I have been much delayed in preparing this next stage of construction for a variety of reasons, but here are the latest steps.
The aircraft had twin booms with tractor engines - as the booms were almost square in cross section they were reletively easy to cut out from 30 thou card.

The sides of the booms had air cooling vents for the engines so these were added and shaped from 10 x 20 thou strip as described for the nacelle above:

The bottom surface of the booms has a marked curve as can be seen in the image above, so to make the card fit better I held the blade of a pair of scissors on the under surface of the card, pushed on the upper surface with my thumb and pulled the card between my thumb and the scissor blade. This was repeated several times until the card was sufficiently curved to match the required shape. I used strips of scrap card to act as supports along the inside edges of the corners and ran liquid Revell Contacta glue along the joints for the initial adhesion, reinforced with liquid cement where necessary. Two small squares cut from scrap card were used inside the booms to help reinforce and keep them square:

The top of the boom behind the engine had a curved surface so I moulded these from 30 thou card. At the same time I moulded the rounded fronts in the same way: the latter will be added later.

I hope that the next update will not take quite so long i.e. I am hoping that life will be a little quieter in the near future!
Thanks for looking.
Stevef.
I have been much delayed in preparing this next stage of construction for a variety of reasons, but here are the latest steps.
The aircraft had twin booms with tractor engines - as the booms were almost square in cross section they were reletively easy to cut out from 30 thou card.
The sides of the booms had air cooling vents for the engines so these were added and shaped from 10 x 20 thou strip as described for the nacelle above:
The bottom surface of the booms has a marked curve as can be seen in the image above, so to make the card fit better I held the blade of a pair of scissors on the under surface of the card, pushed on the upper surface with my thumb and pulled the card between my thumb and the scissor blade. This was repeated several times until the card was sufficiently curved to match the required shape. I used strips of scrap card to act as supports along the inside edges of the corners and ran liquid Revell Contacta glue along the joints for the initial adhesion, reinforced with liquid cement where necessary. Two small squares cut from scrap card were used inside the booms to help reinforce and keep them square:
The top of the boom behind the engine had a curved surface so I moulded these from 30 thou card. At the same time I moulded the rounded fronts in the same way: the latter will be added later.
I hope that the next update will not take quite so long i.e. I am hoping that life will be a little quieter in the near future!
Thanks for looking.
Stevef.
Please Log in to join the conversation.
6 years 8 months ago #239
by Stevef
Replied by Stevef on topic Scratch build 1/72 Caproni Ca 5
Evening All,
The difference between scratch building and kit building is that for the former the modeller has to make the parts - after that it is just another assembly job. Making the parts can take a little while though and usually I make them as I need them so that they do not lie around and get lost or damaged. For this model I seem to have made most of the parts before I start any major assemblies (fuselage nacelle, booms and engines excepted). This seems to have come about because I have simply not had the time to sit and do some modelling for more than one or two isolayed sessions recently: making/shaping parts has been the only sensible thing to do.
I assembled the two remaining engines, and carved three propellors from wood (at the rate of one per evening - no more time at the moment!)

I also made up the eight wheels from discs of 60 thou card with 80 thou rod. I wound the rod around a large paintbrush handle and held one end with a pair of pliers and the other with my fingers. Then I plunged the rod into boiling water for a few seconds. The diameter of the paintbrush handle was slightly smaller than the rim of the disc: this means that the rod has to be pulled outwards to sit tightly around the disc - a small amout of liquid cement holds the tyre in place and any small gaps can be easily filled. Painted they will easily pass muster:

I have also added the curved tops to the booms and made some other odds and ends including struts so the parts are beginning to look like a conventional kit:

The next step will be to start assembling the nacelle and booms to the lower wing, adding the fronts of the booms and then fitting the boom engines and radiators (they are still to be made), so hopefully I can start to see an aeroplane beginning to emerge. Until next time....
Thanks for looking.
Stevef.
The difference between scratch building and kit building is that for the former the modeller has to make the parts - after that it is just another assembly job. Making the parts can take a little while though and usually I make them as I need them so that they do not lie around and get lost or damaged. For this model I seem to have made most of the parts before I start any major assemblies (fuselage nacelle, booms and engines excepted). This seems to have come about because I have simply not had the time to sit and do some modelling for more than one or two isolayed sessions recently: making/shaping parts has been the only sensible thing to do.
I assembled the two remaining engines, and carved three propellors from wood (at the rate of one per evening - no more time at the moment!)
I also made up the eight wheels from discs of 60 thou card with 80 thou rod. I wound the rod around a large paintbrush handle and held one end with a pair of pliers and the other with my fingers. Then I plunged the rod into boiling water for a few seconds. The diameter of the paintbrush handle was slightly smaller than the rim of the disc: this means that the rod has to be pulled outwards to sit tightly around the disc - a small amout of liquid cement holds the tyre in place and any small gaps can be easily filled. Painted they will easily pass muster:
I have also added the curved tops to the booms and made some other odds and ends including struts so the parts are beginning to look like a conventional kit:
The next step will be to start assembling the nacelle and booms to the lower wing, adding the fronts of the booms and then fitting the boom engines and radiators (they are still to be made), so hopefully I can start to see an aeroplane beginning to emerge. Until next time....
Thanks for looking.
Stevef.
Please Log in to join the conversation.
6 years 8 months ago #240
by Stevef
Replied by Stevef on topic Scratch build 1/72 Caproni Ca 5
Evening All,
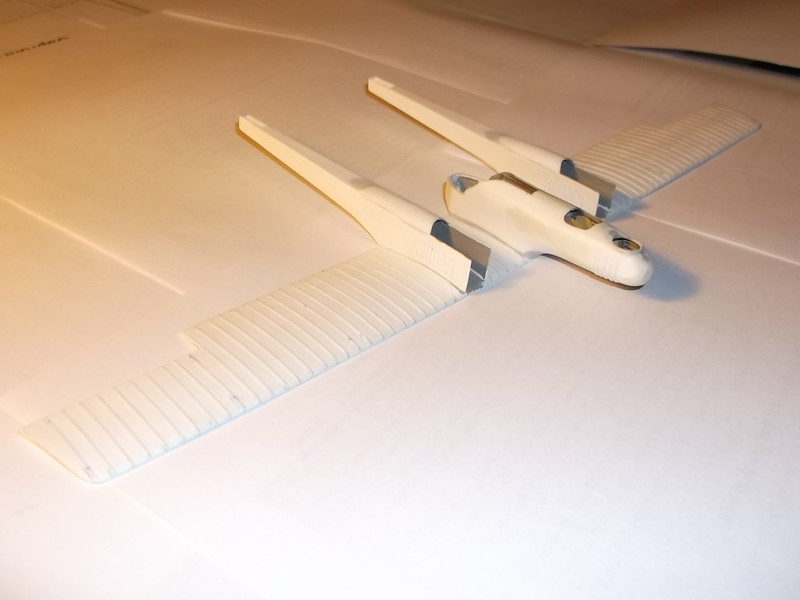
Following on from the last build post I have manged to put the nacelle and booms on to the lower wing and add some other details. In a week this has started to look like an aeroplane.
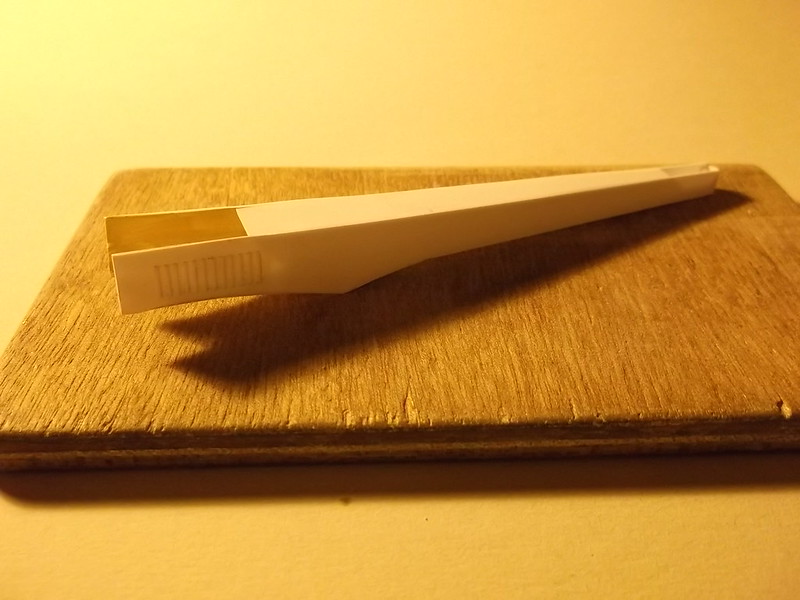
First up was to cement the fuselage nacelle to the lower wing. The alignment laterally and horizontally needs to be accurate, so to get the former right I laid the wing on a plan and then adjusted the nacelle sideways until it was true. To get the horizontal line correct I resorted to one of my master jigs: in this case a piece of sprue with which I stir my enamel paints placed on some lengths of plastic card: simple, cheap and completely effective - and the bonus is that the parts are ready to hand and easily stored!

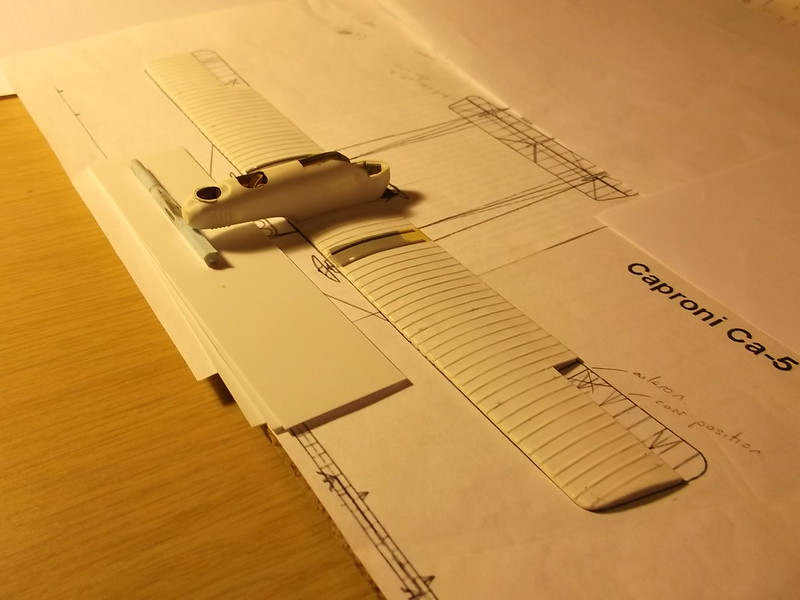
A small amount of filler was used along the joint but I was very pleased with how little was needed in the end. With the nacelle in place the booms could follow: I used the same method as per the nacelle by laying the wing over the plans and aligning the booms on the plan. I cemented both booms at the same time and to ensure that they were properly parallel I employed another jig at the rear - also from simple flexible materials! To stop the open ends at the front splaying outwards I used a pair of hair clips to keep them correctly aligned:
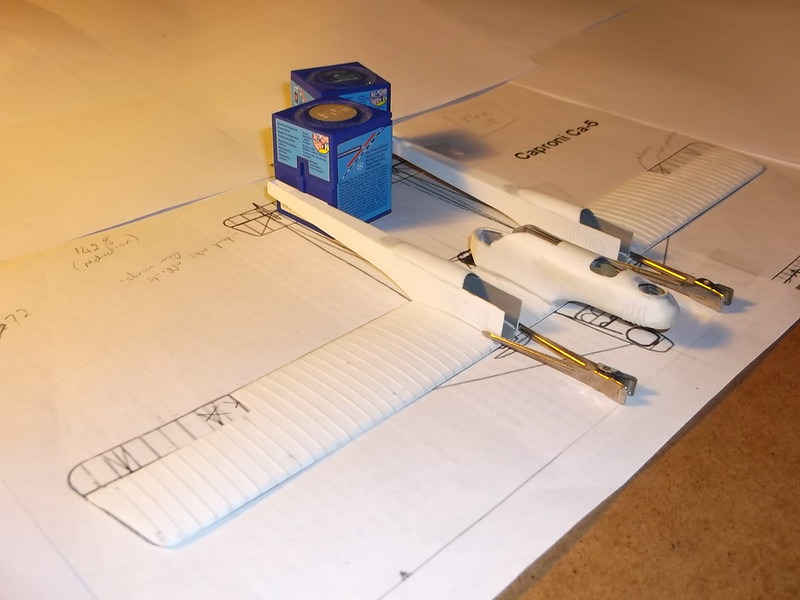

Once again a little filler was required to clean up the joints but as these images show, not very much was required:

Following on from the last build post I have manged to put the nacelle and booms on to the lower wing and add some other details. In a week this has started to look like an aeroplane.
First up was to cement the fuselage nacelle to the lower wing. The alignment laterally and horizontally needs to be accurate, so to get the former right I laid the wing on a plan and then adjusted the nacelle sideways until it was true. To get the horizontal line correct I resorted to one of my master jigs: in this case a piece of sprue with which I stir my enamel paints placed on some lengths of plastic card: simple, cheap and completely effective - and the bonus is that the parts are ready to hand and easily stored!
A small amount of filler was used along the joint but I was very pleased with how little was needed in the end. With the nacelle in place the booms could follow: I used the same method as per the nacelle by laying the wing over the plans and aligning the booms on the plan. I cemented both booms at the same time and to ensure that they were properly parallel I employed another jig at the rear - also from simple flexible materials! To stop the open ends at the front splaying outwards I used a pair of hair clips to keep them correctly aligned:
Once again a little filler was required to clean up the joints but as these images show, not very much was required:
Please Log in to join the conversation.
Time to create page: 0.174 seconds
- You are here:
-
Home

-
Forum
-
Work in progress
-
Airfield
-
Archive
- Scratch build 1/72 Caproni Ca 5