Airfix large scale FW190
8 years 10 months ago #44
by DaveB
Airfix large scale FW190 was created by DaveB
Dear all,
I'm about three to four weeks into my latest project, so unfortunately I do not have a build report from the very start.
I've pondered having a go at Airfix's 24th scale Focke Wulf FW190 A8 kit on and off for some time. This was mainly due to online articles berating this kit for poor fit.
I finally caved in when I saw this one in 'Stamps and Hobbies' shop window in Gravesend and decided to take the plunge as I really do like the look of this particular aircraft.
Well I have to say that this is, without doubt, the worse Airfix kit in this large scale series. The molds are really past their prime being very poor on the sprue and each part is covered in flash. Add to the fact that the instructions are pretty vague regarding part placement which means you really have to try and figure things out for yourself. Assembly itself has been a right headache as absolutely nothing fits as it should. The first problem is getting the cockpit assembly into the fuselage halves. I had to really remove a lot of plastic before I could achieve a half reasonable fit.
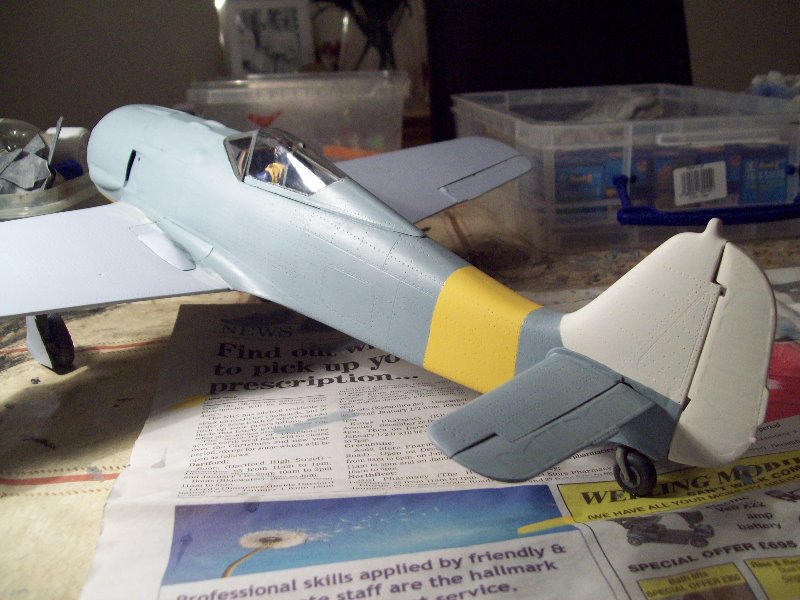
I then started to discover that some parts are missing - namely the clear reflector gunsight (replaced with clear plastic sheet), cockpit headrest support strut (fabricated from piece of the sprue cut and filed to shape) and most serious of all, the lower portion of the port side elevator. I could only think of using two pieces of sheet plastic glued in place then trimmed to size once set. Not perfect, but best I could do here.
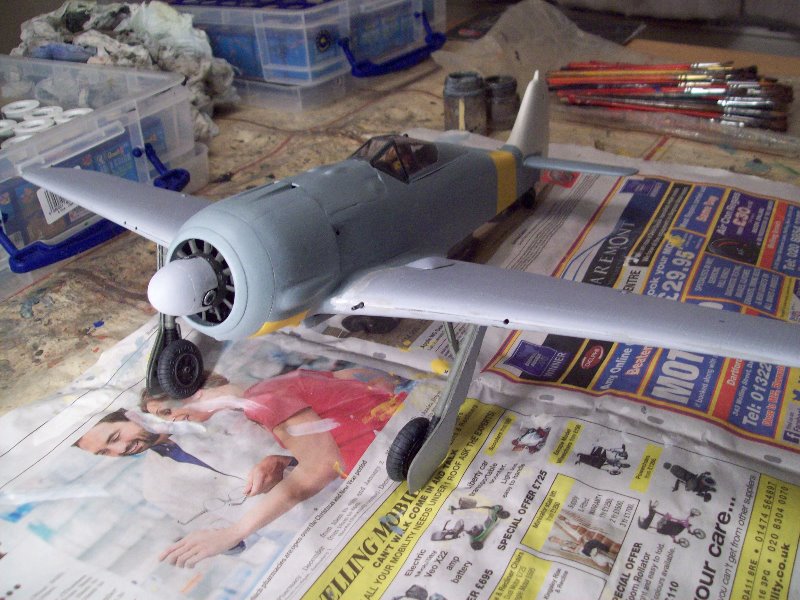
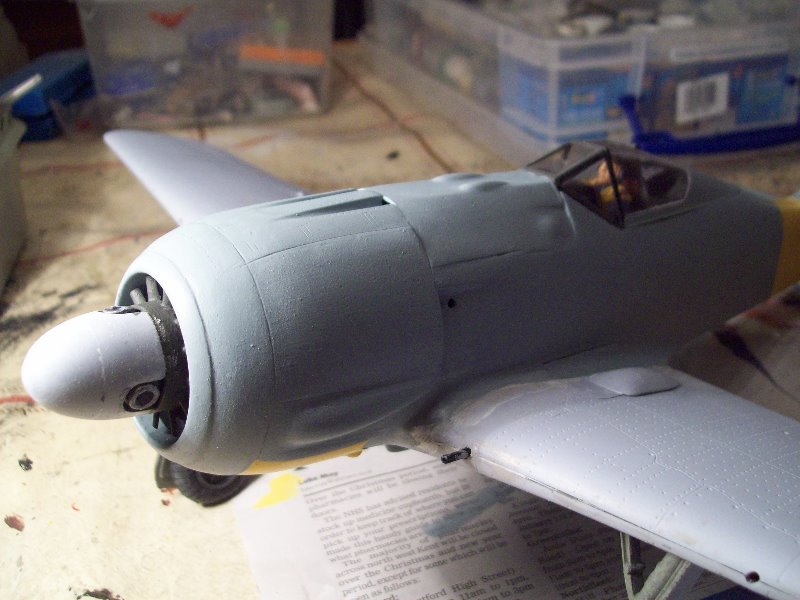
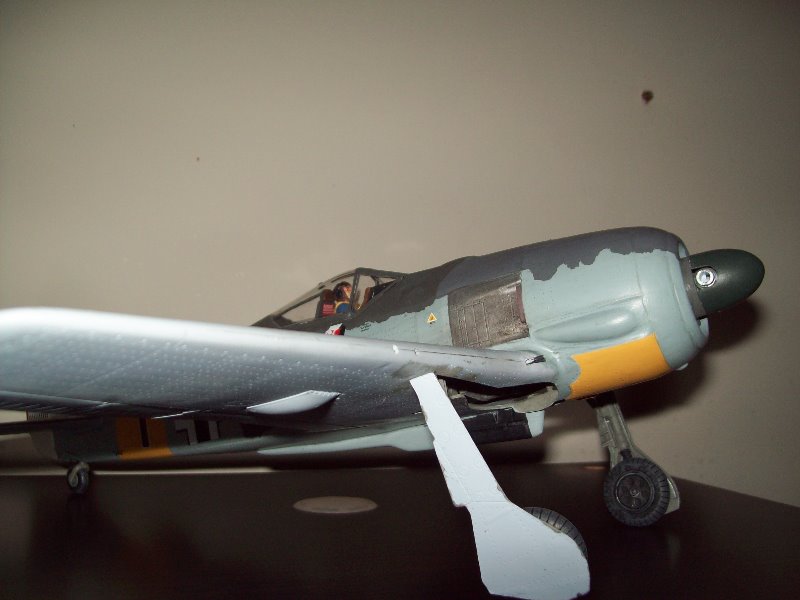
The next serious fit issue is the engine and cowling covers. If engine is assembled as shown in the instructions, there is a fan disc that sits in front of the radial engine and immediately behind the prop shaft and spinner that extends beyond the front cowling by some distance. I was already aware of this issue but did not expect it so difficult to overcome (fan disc should sit just within the front cowling ring) with a lot of effort. Long story short, I ended up having to remove the rear cylinder banks completely and installed the front half of engine using sections of sprue and replacement engine mounts - obviously not ideal but I wanted engine within cowling anyway. Then the real pain began. The separate cowling panels just do not fit together as they should, causing me the most real grieve of the whole build. I got each panel roughly together then once set, filled huge gaps with strips of plastic sheet, trimmed these flush, applied model filler and sanded this all smooth when dry. Still not perfect, but take a look at what others have done on the web and I see what I mean.
Final part of the building pain was fitting the lower wing half section to the fuselage - a completely and utterly useless fit. I simply persevered using lots of cement and super glue till I got an OK join. I then installed upper wing sections. There is then a lovely large gap at the wing root. Overcome with more strips of plastic sheet and simply pushed vertically up against the root until it set. This was actually good because it gave the correct wing dihedral angle so was happy with this. The wing root could then be tidied in the usual manner. Most strips of plastic sheet was then used on large gaps on the leading edges of the wings.
How this kit never ended up being thrown against the wall on more than one occasion I will never know!! However, now all the major assembly is over, it is starting to look an impressive looking model.
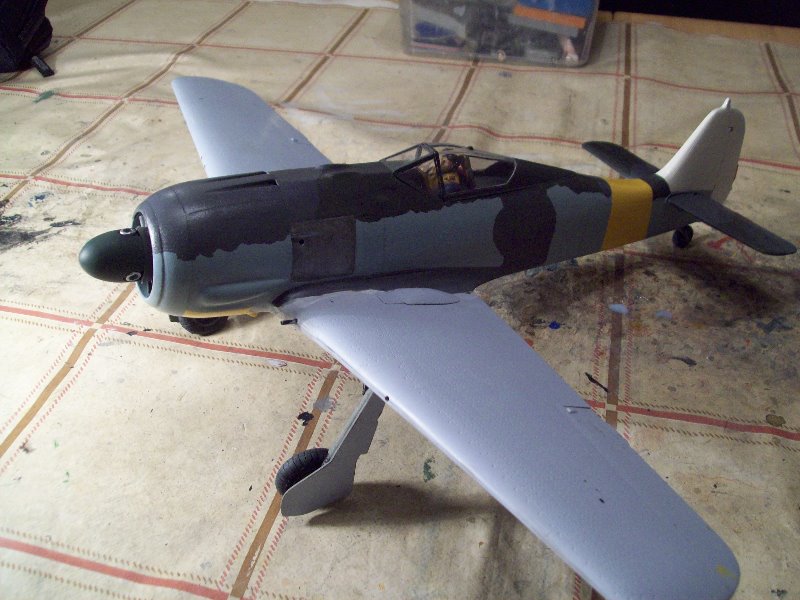
Over the last couple of evenings I have made a start on painting the model commencing with the fuselage as the pictures below show. Clear gloss applied this evening in preparation for decaling. I approach painting in this way as I can hold onto the wings whilst brush painting.
More progress in due course.
Regards
Dave
Please Log in to join the conversation.
- Clive Creer
-

- Offline
- Administrator
-

Less
More
- Posts: 35
- Thank you received: 2
8 years 10 months ago #45
by Clive Creer
I love the smell of Tamiya Extra Thin in the morning!
Replied by Clive Creer on topic Airfix large scale FW190
Looking good Dave, I hope to see this in the flesh soon! 
I love the smell of Tamiya Extra Thin in the morning!
Please Log in to join the conversation.
8 years 10 months ago #46
by DaveB
Replied by DaveB on topic Airfix large scale FW190
Please Log in to join the conversation.
8 years 10 months ago #47
by DaveB
Replied by DaveB on topic Airfix large scale FW190
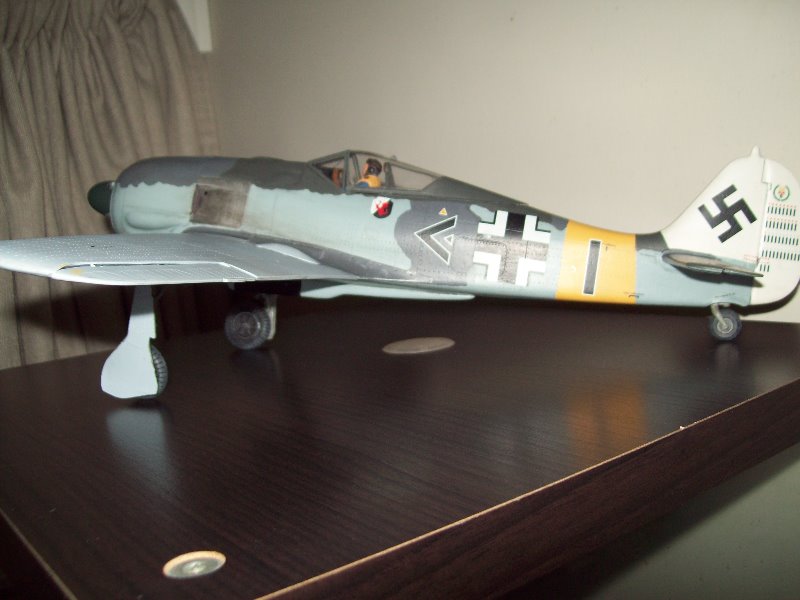
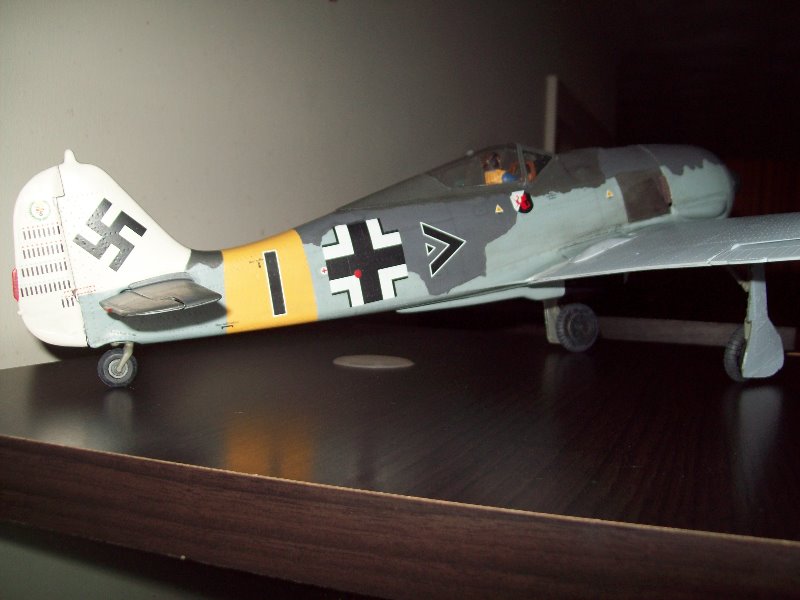
Excellent decals in this kit - managed to get these on pretty quickly last night. Sealed in with 4 coats of semi gloss clear. Some minor weathering added once this was all dry.
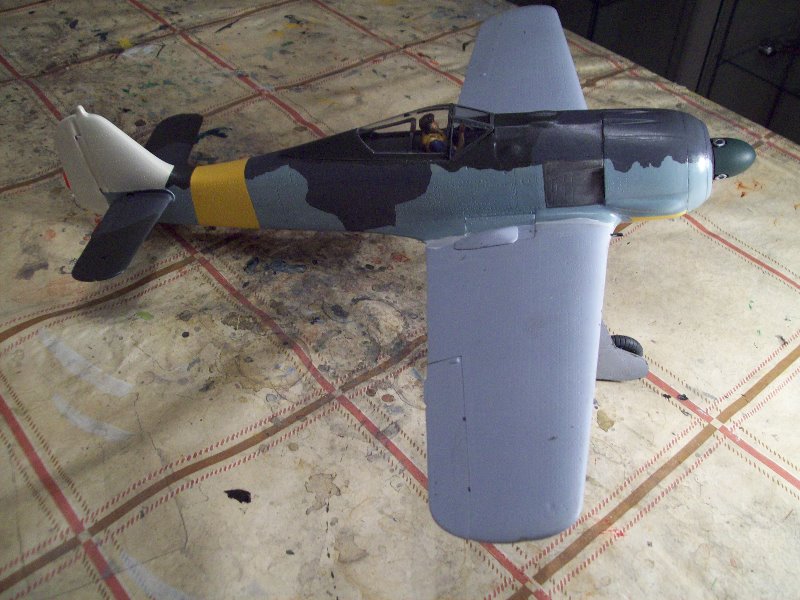
I forgot to mention previously that I had to use some Humbrol acrylic paints as I could not get a match with Revell (paints I use) aqua colour range apart from the white and yellow. This would not normally be a problem but the Humbrol paint does not dry as smooth as the Revell paints. On close examination you will see a more 'rougher' texture to the Humbrol ones although there are no brush strokes evident.
Regards
Dave
Please Log in to join the conversation.
8 years 10 months ago #55
by DaveB
Replied by DaveB on topic Airfix large scale FW190
All painting has now been completed, there only remains to add the wing top section markings. Once this is done, I can add a further wash to bring some detail out.
I am finally on the downhill run with this now and will only need to add the prop blades, footstep and rig the radio antenna before I can call this one complete.
Regards
Dave
I am finally on the downhill run with this now and will only need to add the prop blades, footstep and rig the radio antenna before I can call this one complete.
Regards
Dave
Please Log in to join the conversation.
Time to create page: 0.124 seconds
- You are here:
-
Home

-
Forum

-
Work in progress

-
Airfield

-
Archive

- Airfix large scale FW190
