Siemens Schuckert Werke (SSW) Rs 1: scratch build 1/72
7 years 9 months ago #64
by Stevef
Warning: Trying to access array offset on value of type bool in /var/www/vhosts/gmms.org.uk/httpdocs/libraries/kunena/external/nbbc/nbbc.php on line 2819
Warning: Trying to access array offset on value of type bool in /var/www/vhosts/gmms.org.uk/httpdocs/libraries/kunena/external/nbbc/nbbc.php on line 2819
Warning: Trying to access array offset on value of type bool in /var/www/vhosts/gmms.org.uk/httpdocs/libraries/kunena/external/nbbc/nbbc.php on line 2819
Warning: Trying to access array offset on value of type bool in /var/www/vhosts/gmms.org.uk/httpdocs/libraries/kunena/external/nbbc/nbbc.php on line 2819
Warning: Trying to access array offset on value of type bool in /var/www/vhosts/gmms.org.uk/httpdocs/libraries/kunena/external/nbbc/nbbc.php on line 2819
Warning: Trying to access array offset on value of type bool in /var/www/vhosts/gmms.org.uk/httpdocs/libraries/kunena/external/nbbc/nbbc.php on line 2819
Evening All,
Thank you Clive for your positive comment - I do hope to finish this before the club meeting in March so you may see it then.
The first piece to be made after I had assembled the fuselage and nose was the cockpit glazing. I made this in a single piece of clear 20 thou acetate sheet which was plunge moulded in the usual way. I needed to add a little filler at the top to get the contours right but this will not matter as this area was covered on the machine - the glazed parts were lower down. It is noteworthy too that the pilots did not have a windscreen - there was a large hole with side windows and windows above the hole. Later after the wings were fitted I added framing from 10 x 20 thou Evergreen strip.
I fitted the lower wings one at a time. The pins which I had put through the bottom of the fuselage were to go into holes which I had drilled into the ends of the wings. I had to tidy the ends of the wings a little with some thin card because the laminations had left some uneven edges. When I had dry fitted the wings and checked that all was aligned I started with the starboard (right) wing. Superglue was put on the ends of the pins and cement to the plastic edges of the wing. The wing was then attached to the pins and supported while the cement dried. The superglue dried quickly and held things in place but I decided to take no chances and left everything for an hour.
The struts had been pre-cut and shaped from 30 x 60 thou Evergreen strip but they had to be trimmed to fit exactly. I measured the gap with dividers and final trimming was done by offering the strut to the hole. The inner rear strut was placed first and allowed to dry for 10 minutes.
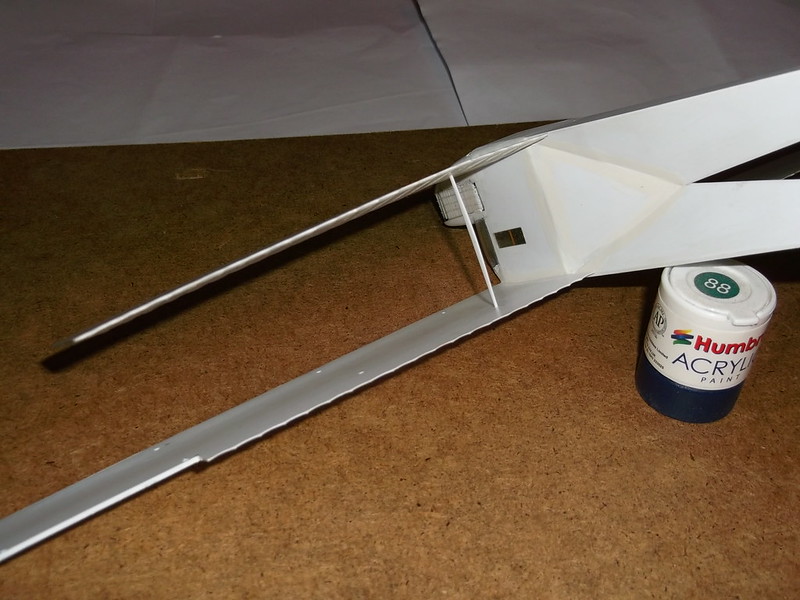
The remaining struts could then be fixed and the lower wing was firmly in place.
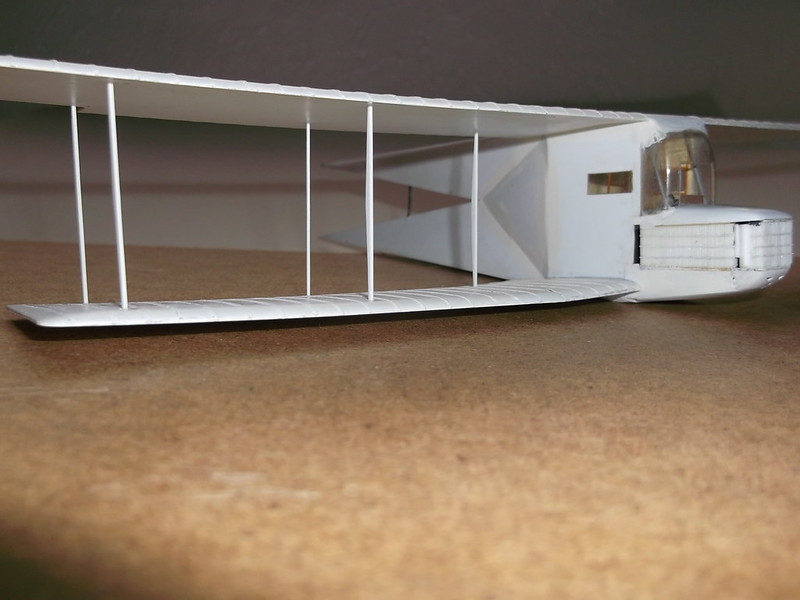
The above procedure was repeated on the port (left) side. Finally the upper wing overhang bracing struts were fixed into place.
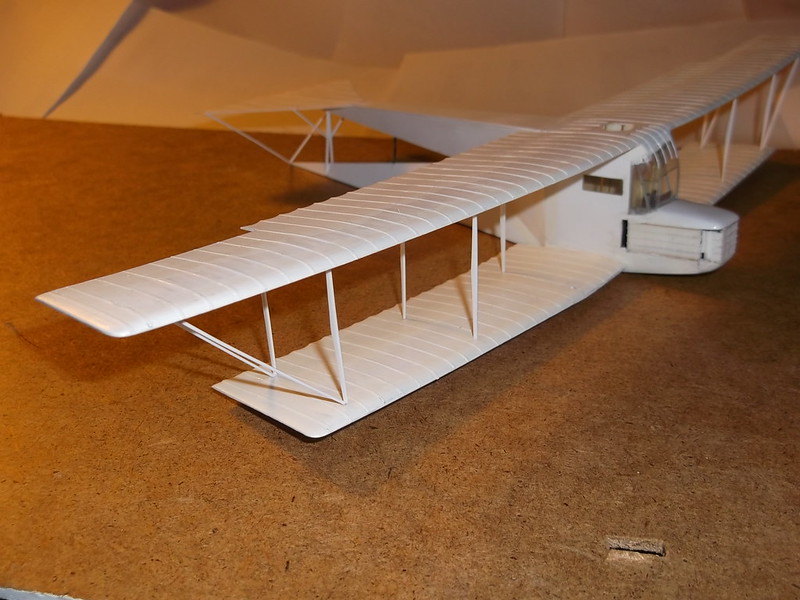
Now the horizontal tail surface could be fixed to the top of the rear fuselage and the struts glued into place. These were made from 20 x 30 thou Evergreen strip.
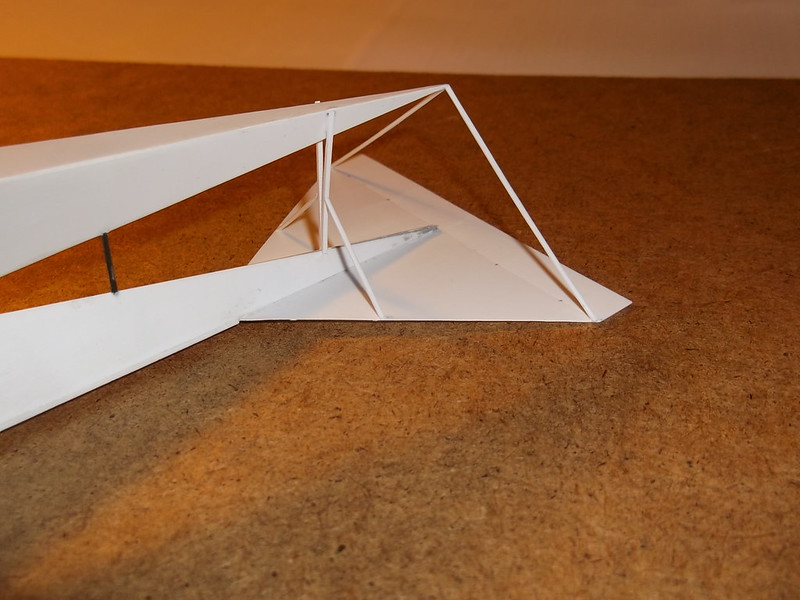
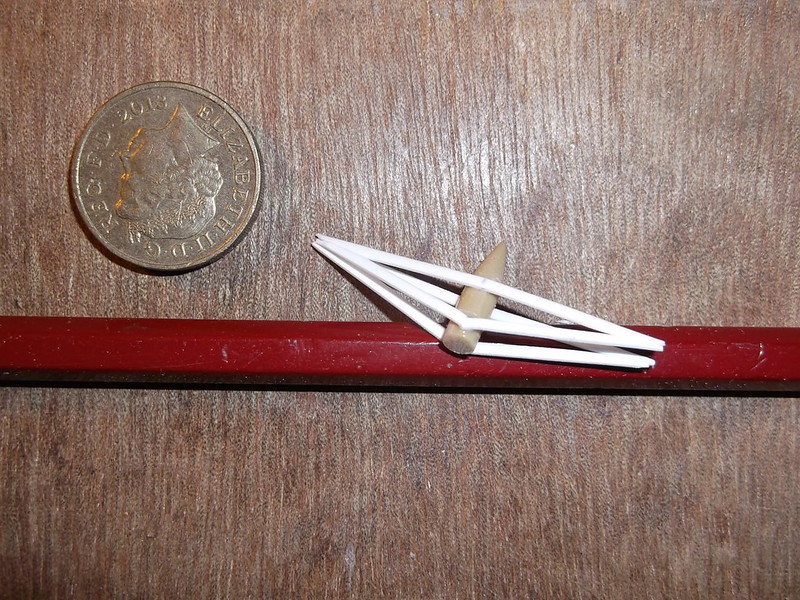
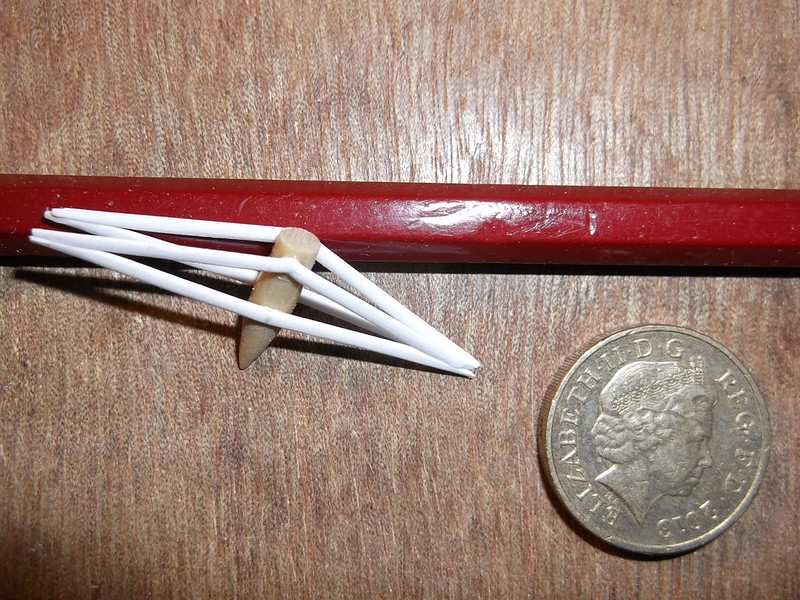
I assembled the gearbox bearer struts. These too were Evergreen strip (30 x 40) which was sanded to aerofoil section. I measured the rear struts first and then bent them gently at the mid point before gluing them to the sides of the gearbox. The front struts were shaped and then cut in the centre and the corners at the rear of the centres cut off so that when the struts were joined to the gearbox the tops and bottoms met the rear struts. This sounds complicated but I hope the photos show what I mean. I did not glue the top and bottom of the strut assemblies until all four struts had set on the gearbox. Finally after the struts had been glued together both sub-assemblies could be inserted between the wings and glued into place.
The next stage will be to paint the model: this will take time as once again I am about to go on my travels.
Thanks for looking.
Steve.
Warning: Trying to access array offset on value of type bool in /var/www/vhosts/gmms.org.uk/httpdocs/libraries/kunena/external/nbbc/nbbc.php on line 2819
Warning: Trying to access array offset on value of type bool in /var/www/vhosts/gmms.org.uk/httpdocs/libraries/kunena/external/nbbc/nbbc.php on line 2819
Warning: Trying to access array offset on value of type bool in /var/www/vhosts/gmms.org.uk/httpdocs/libraries/kunena/external/nbbc/nbbc.php on line 2819
Warning: Trying to access array offset on value of type bool in /var/www/vhosts/gmms.org.uk/httpdocs/libraries/kunena/external/nbbc/nbbc.php on line 2819
Warning: Trying to access array offset on value of type bool in /var/www/vhosts/gmms.org.uk/httpdocs/libraries/kunena/external/nbbc/nbbc.php on line 2819
Warning: Trying to access array offset on value of type bool in /var/www/vhosts/gmms.org.uk/httpdocs/libraries/kunena/external/nbbc/nbbc.php on line 2819
Evening All,
Thank you Clive for your positive comment - I do hope to finish this before the club meeting in March so you may see it then.
The first piece to be made after I had assembled the fuselage and nose was the cockpit glazing. I made this in a single piece of clear 20 thou acetate sheet which was plunge moulded in the usual way. I needed to add a little filler at the top to get the contours right but this will not matter as this area was covered on the machine - the glazed parts were lower down. It is noteworthy too that the pilots did not have a windscreen - there was a large hole with side windows and windows above the hole. Later after the wings were fitted I added framing from 10 x 20 thou Evergreen strip.
I fitted the lower wings one at a time. The pins which I had put through the bottom of the fuselage were to go into holes which I had drilled into the ends of the wings. I had to tidy the ends of the wings a little with some thin card because the laminations had left some uneven edges. When I had dry fitted the wings and checked that all was aligned I started with the starboard (right) wing. Superglue was put on the ends of the pins and cement to the plastic edges of the wing. The wing was then attached to the pins and supported while the cement dried. The superglue dried quickly and held things in place but I decided to take no chances and left everything for an hour.
The struts had been pre-cut and shaped from 30 x 60 thou Evergreen strip but they had to be trimmed to fit exactly. I measured the gap with dividers and final trimming was done by offering the strut to the hole. The inner rear strut was placed first and allowed to dry for 10 minutes.

The remaining struts could then be fixed and the lower wing was firmly in place.

The above procedure was repeated on the port (left) side. Finally the upper wing overhang bracing struts were fixed into place.

Now the horizontal tail surface could be fixed to the top of the rear fuselage and the struts glued into place. These were made from 20 x 30 thou Evergreen strip.

I assembled the gearbox bearer struts. These too were Evergreen strip (30 x 40) which was sanded to aerofoil section. I measured the rear struts first and then bent them gently at the mid point before gluing them to the sides of the gearbox. The front struts were shaped and then cut in the centre and the corners at the rear of the centres cut off so that when the struts were joined to the gearbox the tops and bottoms met the rear struts. This sounds complicated but I hope the photos show what I mean. I did not glue the top and bottom of the strut assemblies until all four struts had set on the gearbox. Finally after the struts had been glued together both sub-assemblies could be inserted between the wings and glued into place.


The next stage will be to paint the model: this will take time as once again I am about to go on my travels.
Thanks for looking.
Steve.
Please Log in to join the conversation.
7 years 8 months ago #86
by Stevef
Warning: Trying to access array offset on value of type bool in /var/www/vhosts/gmms.org.uk/httpdocs/libraries/kunena/external/nbbc/nbbc.php on line 2819
Warning: Trying to access array offset on value of type bool in /var/www/vhosts/gmms.org.uk/httpdocs/libraries/kunena/external/nbbc/nbbc.php on line 2819
Warning: Trying to access array offset on value of type bool in /var/www/vhosts/gmms.org.uk/httpdocs/libraries/kunena/external/nbbc/nbbc.php on line 2819
Evening All,
Thanks Dave for your kind remarks, they are always appreciated.
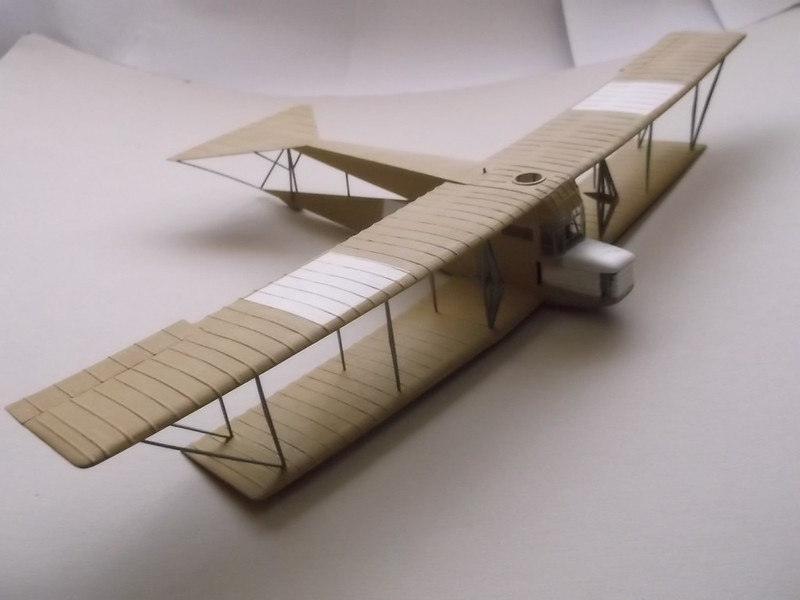
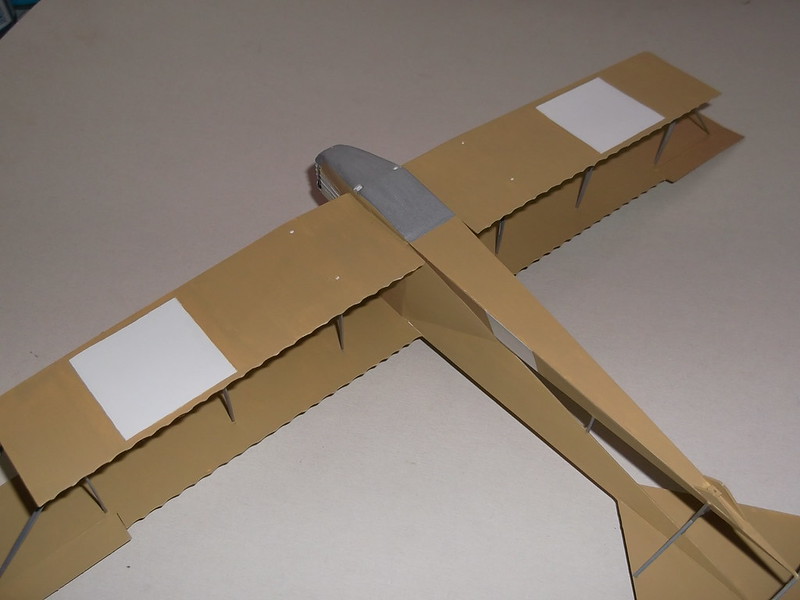
Here is the painting stage of the build. I used Humbrol enamels - a mix of clear doped linen (103) with natural wood (94) in a ratio of 3:2. The DatatFile suggests grey as a colour but I have my doubts - personally I think that natural linen would have been more likely but who can tell from monochrome photos? In any event it took three coats as the first two were too streaky: I thinned the paint for the third and managed to get a much better finish. The white squares are for the crosses (which I have printed but not put on yet), and I have still to paint the radiators (dark grey) and top of the engine cover (anti-glare black). I also am showing a close up of the front struts with the propellor mounts in place as these were not ready for the last post.
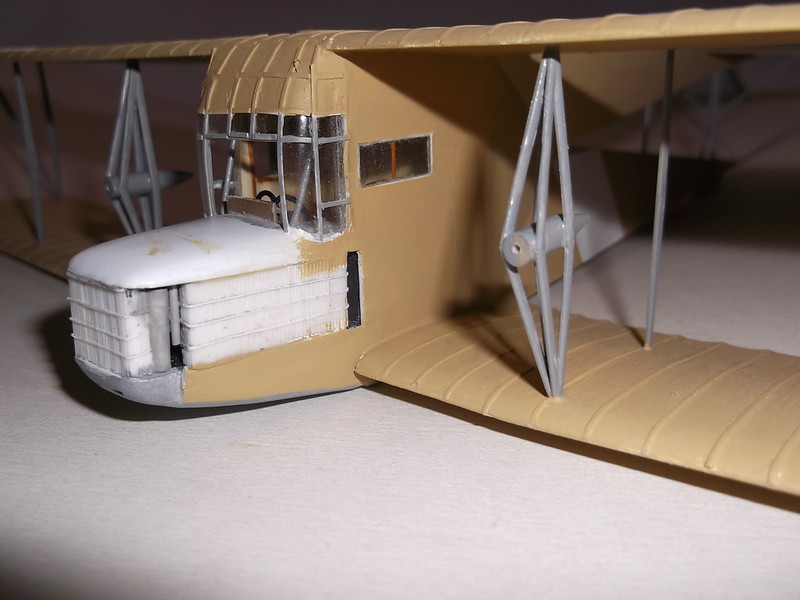
Thanks for looking.
Steve.
Warning: Trying to access array offset on value of type bool in /var/www/vhosts/gmms.org.uk/httpdocs/libraries/kunena/external/nbbc/nbbc.php on line 2819
Warning: Trying to access array offset on value of type bool in /var/www/vhosts/gmms.org.uk/httpdocs/libraries/kunena/external/nbbc/nbbc.php on line 2819
Warning: Trying to access array offset on value of type bool in /var/www/vhosts/gmms.org.uk/httpdocs/libraries/kunena/external/nbbc/nbbc.php on line 2819
Evening All,
Thanks Dave for your kind remarks, they are always appreciated.
Here is the painting stage of the build. I used Humbrol enamels - a mix of clear doped linen (103) with natural wood (94) in a ratio of 3:2. The DatatFile suggests grey as a colour but I have my doubts - personally I think that natural linen would have been more likely but who can tell from monochrome photos? In any event it took three coats as the first two were too streaky: I thinned the paint for the third and managed to get a much better finish. The white squares are for the crosses (which I have printed but not put on yet), and I have still to paint the radiators (dark grey) and top of the engine cover (anti-glare black). I also am showing a close up of the front struts with the propellor mounts in place as these were not ready for the last post.


Thanks for looking.
Steve.
Please Log in to join the conversation.
- Clive Creer
-

- Offline
- Administrator
-

Less
More
- Posts: 34
- Thank you received: 2
7 years 8 months ago #87
by Clive Creer
I love the smell of Tamiya Extra Thin in the morning!
Looking great Steve, this is coming along nicely. Soon be finished!!!
I love the smell of Tamiya Extra Thin in the morning!
Please Log in to join the conversation.
7 years 8 months ago #96
by Stevef
Warning: Trying to access array offset on value of type bool in /var/www/vhosts/gmms.org.uk/httpdocs/libraries/kunena/external/nbbc/nbbc.php on line 2819
Warning: Trying to access array offset on value of type bool in /var/www/vhosts/gmms.org.uk/httpdocs/libraries/kunena/external/nbbc/nbbc.php on line 2819
Warning: Trying to access array offset on value of type bool in /var/www/vhosts/gmms.org.uk/httpdocs/libraries/kunena/external/nbbc/nbbc.php on line 2819
Evening All,
After returning from my travels I have finally managed to complete the model: it has taken longer than expected mainly because of the fiddly nature of the tail unit and some of the other smaller parts.
I started with the main undercarriage - I used 60 thou rod and the wheels which I had already made.
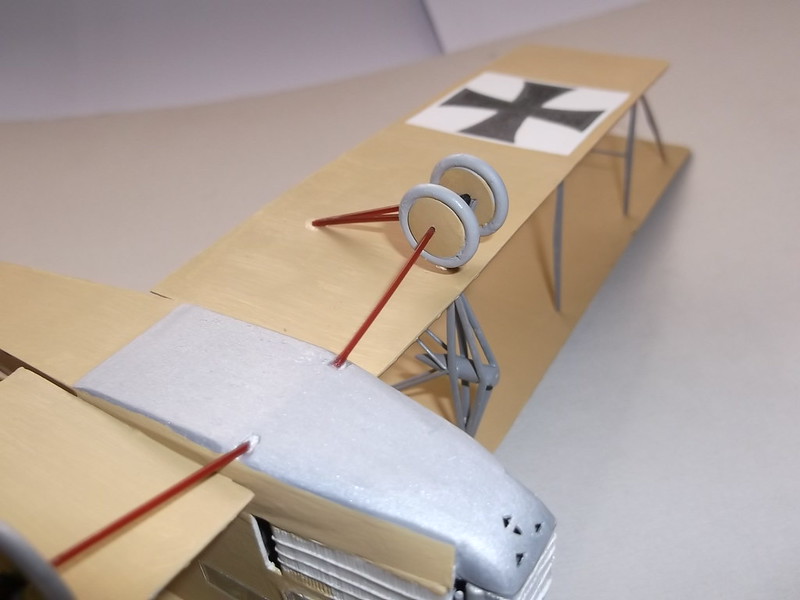
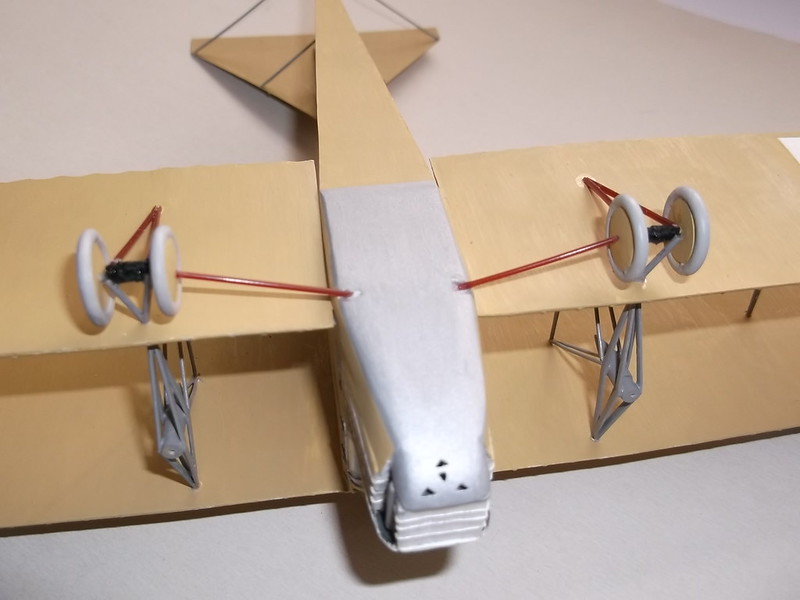
The tail unit was next. First to be fitted was the central rudder followed by the small elevators which were mounted on a pin which passed through the forward part of the central rudder. Last the smaller rudders were put into place. The vertical join bars between the elevators were from 10 x 20 thou card.
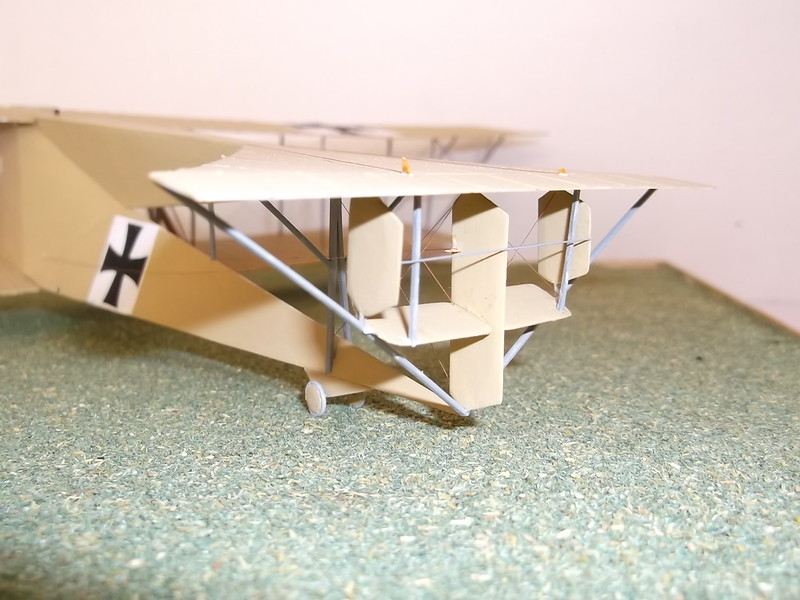
Other details were the tail-wheels, the reinforcing struts behind the gear mechanisms for the propellors, the wing elevators, propellors, and a small triangular structure by the cockpit. I am not sure what this was for but from photos it seem to have been a mounting for an anemometer - an early form of air speed indicator. I also completed the painting of the engine cover and radiators. I rigged it with rolled copper wire as per usual, but in fact this machine had double wires which were bound with linen to reduce drag. However when I tried to simulate the latter with thin strips of card the result looked awful so I resorted to wire even though this is not quite accurate. I will post pictures of the completed model in the gallery shortly.
Thanks for looking.
Stephen.
Warning: Trying to access array offset on value of type bool in /var/www/vhosts/gmms.org.uk/httpdocs/libraries/kunena/external/nbbc/nbbc.php on line 2819
Warning: Trying to access array offset on value of type bool in /var/www/vhosts/gmms.org.uk/httpdocs/libraries/kunena/external/nbbc/nbbc.php on line 2819
Warning: Trying to access array offset on value of type bool in /var/www/vhosts/gmms.org.uk/httpdocs/libraries/kunena/external/nbbc/nbbc.php on line 2819
Evening All,
After returning from my travels I have finally managed to complete the model: it has taken longer than expected mainly because of the fiddly nature of the tail unit and some of the other smaller parts.
I started with the main undercarriage - I used 60 thou rod and the wheels which I had already made.


The tail unit was next. First to be fitted was the central rudder followed by the small elevators which were mounted on a pin which passed through the forward part of the central rudder. Last the smaller rudders were put into place. The vertical join bars between the elevators were from 10 x 20 thou card.

Other details were the tail-wheels, the reinforcing struts behind the gear mechanisms for the propellors, the wing elevators, propellors, and a small triangular structure by the cockpit. I am not sure what this was for but from photos it seem to have been a mounting for an anemometer - an early form of air speed indicator. I also completed the painting of the engine cover and radiators. I rigged it with rolled copper wire as per usual, but in fact this machine had double wires which were bound with linen to reduce drag. However when I tried to simulate the latter with thin strips of card the result looked awful so I resorted to wire even though this is not quite accurate. I will post pictures of the completed model in the gallery shortly.
Thanks for looking.
Stephen.
Please Log in to join the conversation.
Time to create page: 0.126 seconds
- You are here:
-
Home

-
Forum

-
Work in progress

-
Airfield

- Siemens Schuckert Werke (SSW) Rs 1: scratch build 1/72